
Need some advice?
How to Specify Screen-Printed Workwear
Screen printing is worth pricing when you need the same logo on a large batch of workwear. Give your printer the garment, colour, artwork, print positions and quantity for each version. That gives them the information to check whether the fabric suits the print and quote for the work involved.
- Page Contents
- When Screen Printing Suits a Workwear Order
- Work Out the Quantity for Each Print Run
- Prepare Artwork and Print Positions
- Check How the Print Works on Each Garment
- Approve a Sample and Record the Specification
- Compare a Bundle or Request a Quote
When Screen Printing Suits a Workwear Order
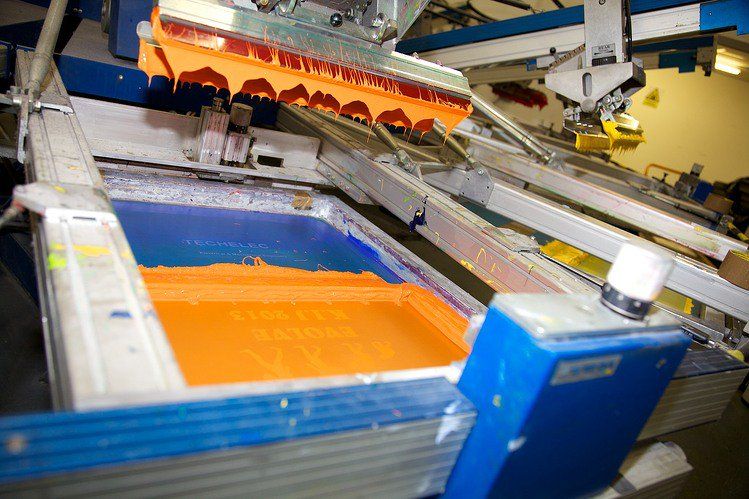
In direct screen printing, ink passes through a mesh stencil onto the garment. For a logo made up of solid colours, the printer typically sets up a screen for each ink colour, aligns the screens and cures the print after application. Once the setup is ready, the printer can repeat the design across the run.
A bold logo on the same T-shirt for several teams is a good starting point. A retailer ordering shirts for a rollout or a depot issuing a uniform across sites can use a common print specification to keep the logo consistent. Our bulk custom T-shirt guide covers how to select a garment and build a size mix for this type of order.
Work Out the Quantity for Each Print Run
The printer spends time preparing the artwork, making the screens and aligning them. A longer run spreads that setup work across more garments. Additional ink colours, positions and versions of the artwork can change what needs to be set up. Give the printer the quantity for each combination so they can price the actual job.
For example, 500 T-shirts with the same one-colour logo in one position can be quoted as a single artwork run. If two branches each need 250 shirts with different logos, give the printer both artwork files and their respective quantities. That lets the printer quote the setup for each design.
List different garment colours as well. A logo that prints directly onto a light shirt may need a base layer of ink on a dark one to show the intended colours. Ask how the garment colour, print positions and artwork affect the finished price. Use our bulk T-shirt pricing guide to compare the total cost at the quantities you expect to use.
Prepare Artwork and Print Positions
Send the original vector logo file if you have it, with the intended size and position for each print. A chest logo and a large back logo need their own dimensions, even when the design is the same. Look at the artwork at its finished size and check whether small lettering, thin lines and spaces will be clear.
Choose a shirt colour that gives the logo enough contrast in the working environment. If a brand colour matters, give the printer the reference and check the finished colour on the actual fabric. The fabric and any base ink affect how the colour looks. For artwork with shading, gradients or several colour versions, our screen printing and heat transfer guide explains the production options to discuss with your printer.
Check How the Print Works on Each Garment
If your order includes T-shirts, polos and outer layers, specify each garment separately. The same artwork can look and feel different across fabrics. Review the proposed print area on the actual garment, including any seams, panels or pockets near the logo.
| Garment or fabric | What to check before approving |
|---|---|
| Smooth cotton jersey T-shirt | The print size, placement and colour on the chosen style. Check the fabric feel if the design covers a large area. |
| Textured piqué polo | How clearly fine detail and edges reproduce on the raised knit. Ask about a sample on the chosen polo. |
| Polyester performance garment | The compatibility of the ink and curing process with the garment. Dye from some polyester fabrics can migrate into the print, so check the colour on a sample. |
| Fleece or coated outer layer | How the fabric surface and finish respond to the proposed decoration. Ask your supplier which method is suitable for that garment. |
For garments supplied as PPE, check the permitted logo size and position with the supplier and confirm the finished garment meets the required specification. Our guide to print or embroidery for uniforms helps you choose a decoration method for each part of a mixed uniform order.
Approve a Sample and Record the Specification
Use a Free Digital Sample to check the logo size and position. If the exact colour, feel or print coverage matters, ask about a physical printed sample on the garment you plan to order. Check the artwork details and agree how the finished shirts will be washed and dried. Our T-shirt print durability guide shows how to assess the sample after washing.
Keep the approved artwork, colour reference, garment code and colour, print dimensions and position with the order number. This gives you a reference for checking the next delivery and matching replacements. Use our staff T-shirt reorder guide if you need to plan top-ups by size.
Compare a Bundle or Request a Quote
If you're ordering the same design across 500 lightweight T-shirts, the 500 screen-printed T-shirts bundle includes a one-colour screen print in one position. Check the size and colour mix and confirm any extra print requirements. If your order has a different quantity or needs full-colour artwork, compare the T-shirt bundles and use our screen print and full-colour bundle comparison to see what each offer includes.
For a mixed workwear order, send the garment choices, quantities, logo files, print positions and delivery date in one brief. We'll check which print setup suits each garment and quote for the finished order.

Latest posts by Andy (see all)
- How to Choose and Order Custom Hoodies for Work and Teams - 13th November 2026
- Custom T-Shirts for University Open Days and Welcome Weeks - 12th November 2026
- What are the Most Common Construction Site Accidents? - 25th April 2026